Laptop Stand Instructions
In my former occupation as a traveling salesman, my office was my car. My passenger seat was
my desk. I had seen many advertisements for in-car laptop desks that all looked nice, but when it
came down to price, didn't look nice enough to justify the price. Prices ranged from 200 dollars
to upwards of 500 dollars for a couple pieces of metal.
I'm no longer a traveling salesman and I work out of my office. However, the occasional long
road trip and the fact that I bought a laptop GPS (from Co-Pilot) had me thinking about the laptop
stand idea again. With the 33 hour drive to Moab imminent, the brain went into overdrive. With
the help of JasonB, this is what I cam up with.
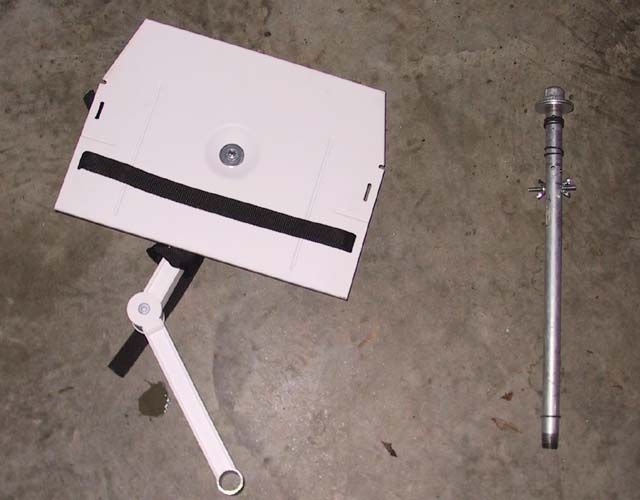
Materials:
-
1 piece of pre-threaded, galvanized steel pipe in 1/2" ID in an 18" length
-
1 piece of pre-threaded, galvanized steel pipe in 1/2" ID in an 14" length
-
2 90 degree pre-threaded, galvanized steel pipe in 1/2" ID elbows
-
1 pre-threaded, galvanized steel, 1/2" base flange (closet flange)
-
1 pre-threaded, galvanized steel. 1/2" end cap
-
1/2" flat washers
-
large quantity of #15 rubber O rings from Home Depot (in the faucet section)
-
Small TV stand from Home Depot- the kind that lets you hang a TV from the wall that has 2
pivoting arms. -
misc. quantity of 1/2" plywood
-
misc. quantity of 1"x3" pine board
-
misc. quantity of wood screws
Procedures:
The building process is very simple. As I did not wand to drill into the floor of the truck, I
constructed a box using the plywood and 1x3 that fit into the foot wells in the passenger area of
the Amigo. I have purposely left the measurements out, as you may want a different size base than
what I have.
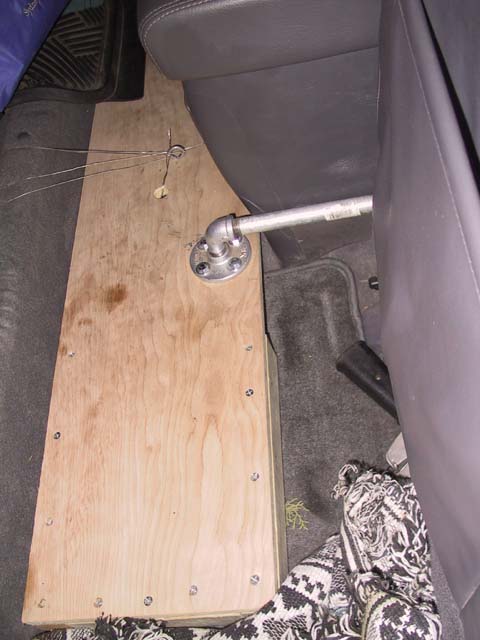
After laying the base down into the foot well, I measured out the distance from where I wanted
the upright portion of the stand to stick out in the front seat area to the point where the 14"
pipe would need to attach into the base. After marking this point, I installed the flange into
the base and the first 90 degree elbow and 14" pipe The base has to be moved to complete this
step. Otherwise, you will not be able to secure pipe to the base. On the end of the base pipe,
attach the other 90 degree elbow so that the opening faces up. You will be placing your upright
pipe (18") here.
After securing the plumbing, place the wood base and the pipe, so that the base pipe is between
the center console and the passenger seat. I placed a block of 1x3 under the elbow to offer
additional support once the added weight of the laptop was present.
![]()
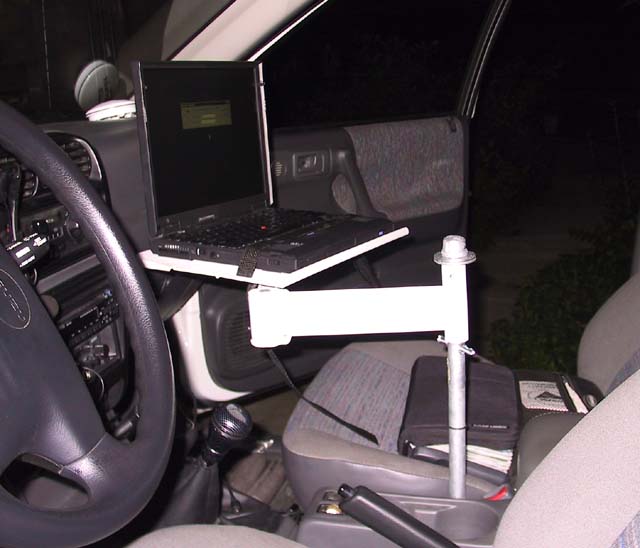
Before installing the upright, measure the length of the TV stands bracket and drill a hole
through the pipe to slide a bolt through. This will prevent the stand from sliding to the bottom
of the upright pipe. Be sure to take into account the threads on the upright pipe that will be
needed to secure the TV stand down. You do not want the stand to go flying off the upright when
you hit a bump. After the cross bolt is installed, take the O-rings and slide them onto the
upright (above the cross- bolt). This will provide tension on the TV stands bracket and prevent
it from swinging wildly left and right. Screw in the upright. Be sure to use a pair of vice
grips to get the upright torqued in.
At this point, you are ready to install the TV stand. Jam the TV stand onto the uprights. It
will be tough getting them onto the O-rings. After the stand is resting on the cross bolt, use
the 1/2" washers to take up any slack or excess space between the top of the TV stand bracket and
the end cap. Tighten down the end cap, and install your laptop.
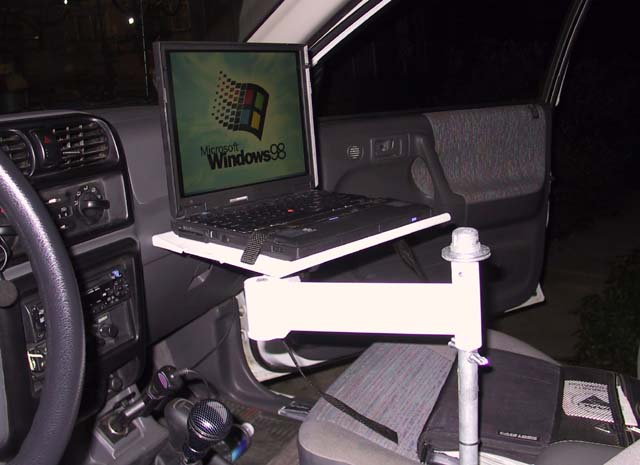
All in all, this laptop stand cost me about $50 in materials and about 2hrs in labor. It paid for itself 5 or 6 times over during the 33 hour outbound
and 39 hour inbound Moab trips.